This article will take 4 minute(s) to read.
[#article-topic-1]Introduction[#article-topic-1]
Selective Call Acceptance allows you to receive only calls that meet your pre-defined criteria. The criteria for each Selective Acceptance entry can be a list of up to 12 phone numbers or digit patterns, a specified time schedule, and a specified holiday schedule.
[#article-topic-2]Selective Call Acceptance[#article-topic-2]
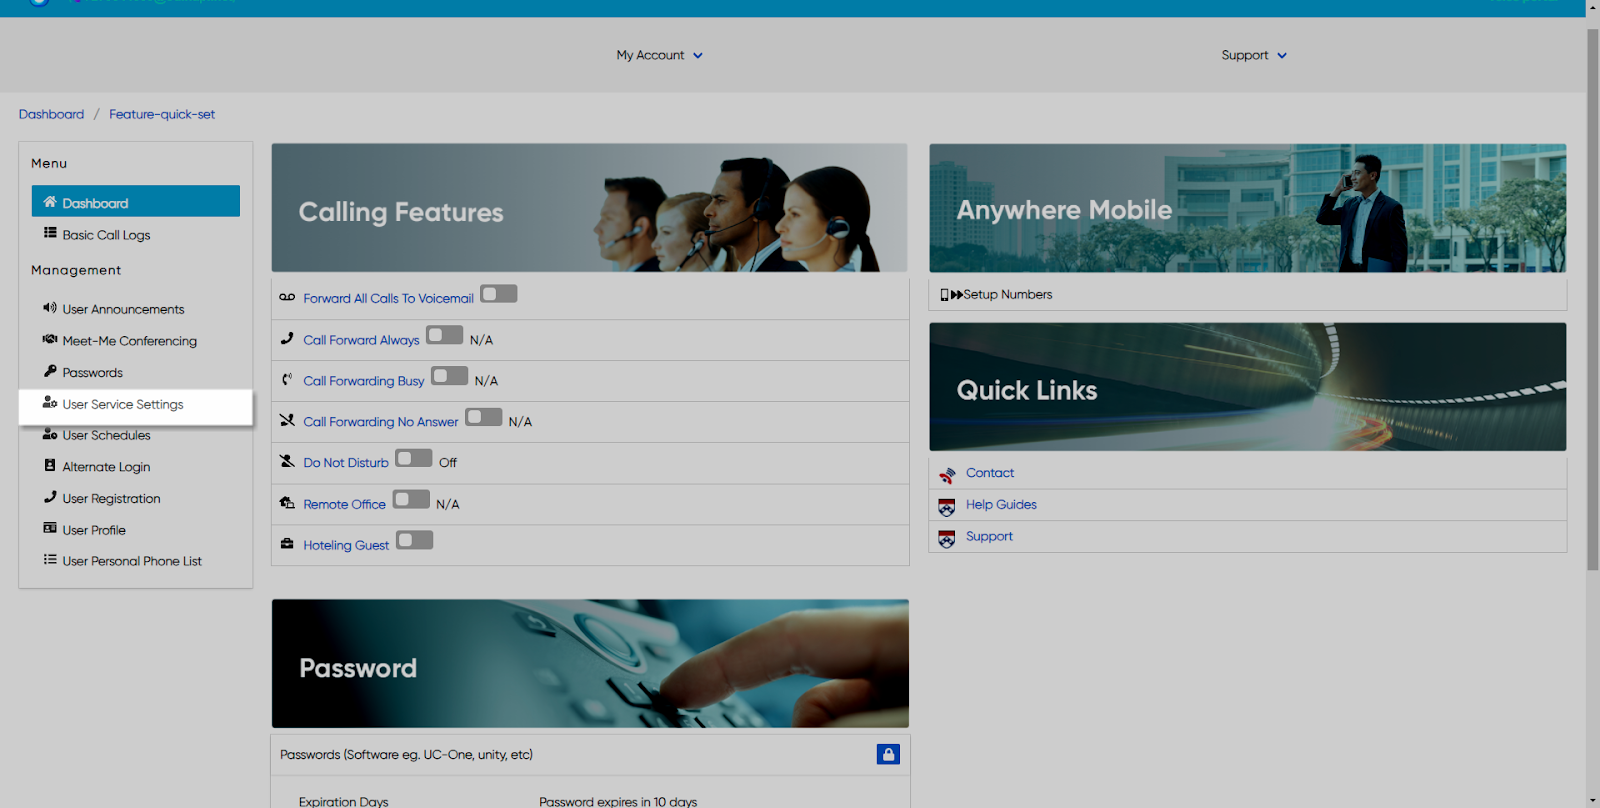
- From the user dashboard, locate and click on User Service Settings.

- The Services page will appear.
- Proceed to locate and click on either Selective Call Acceptance. This will give you access to the Selective Call Acceptance configuration page.

To Configure or Add Selective Call Acceptance:
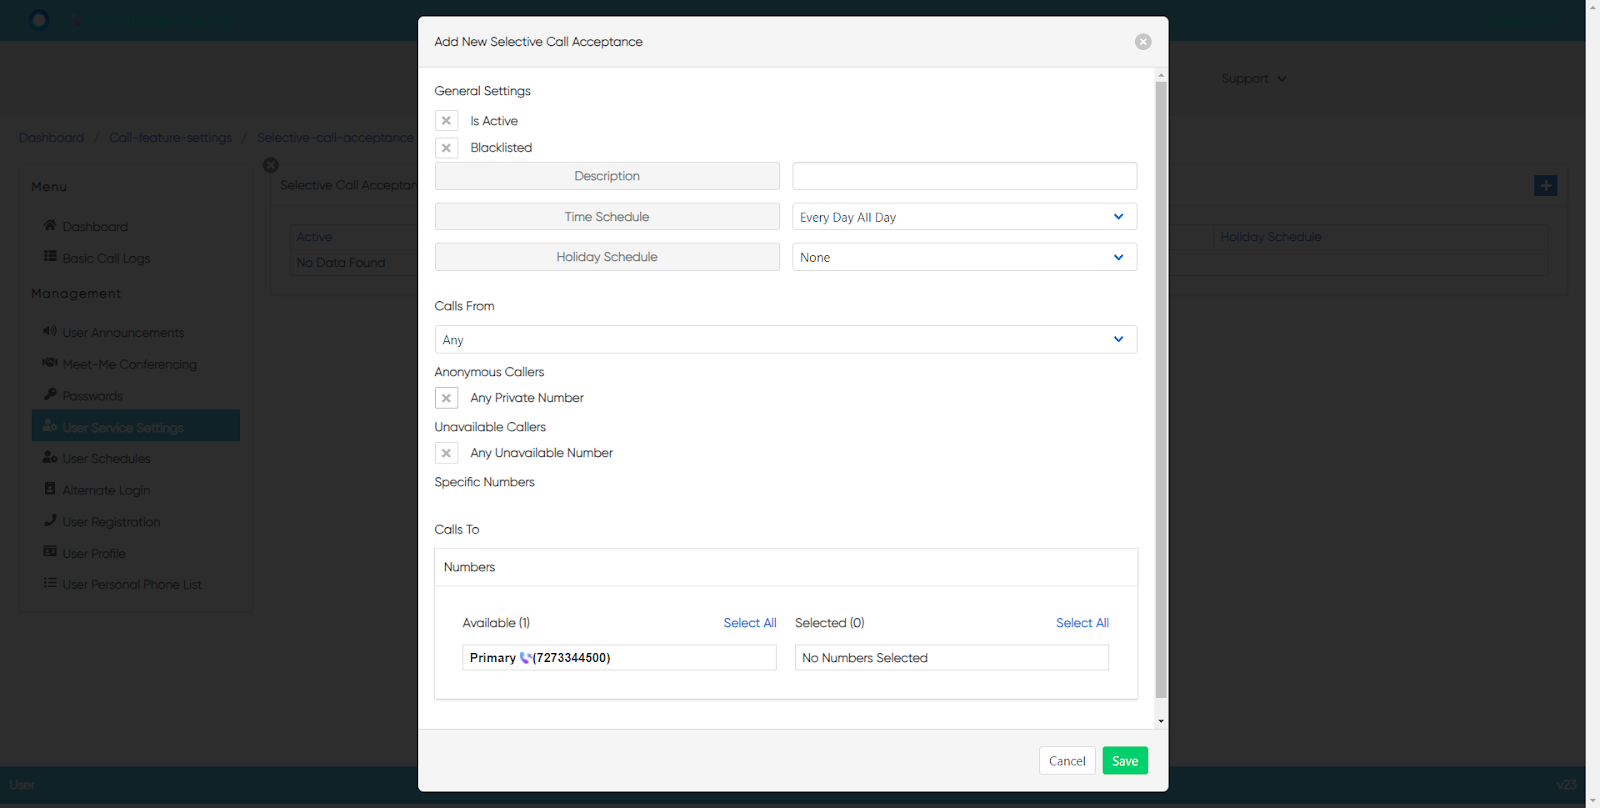
- Click on the Settings or Plus icon within the Select Calls Acceptance table.
- Under the General Settings sections, click Is Active if you wish to enable these settings to the specific selective call. Or you can select to Reject the call, by clicking the Reject Call checkbox.
- Proceed to enter a name for the criteria you want to impose.

- Next, select the Time and Holiday Schedules. Under Time Schedules, you have the following items to choose from. From the Drop-down menu:
a. Every Day All Day
b. User-Created Schedules: these are schedules created by you within the User Schedules tab via the dashboard. To create a schedule, follow the steps within the User Schedules guide.
You also have the option to choose a Holiday Schedule from the Holiday Schedule drop-down menu.
- Select where you want to receive calls from. You have the option to choose one of the following:
a. Any Private Numbers
b. Any Unavailable Numbers
c. Specific Numbers - If choosing this option, use the fields below to enter valid 10-digit numbers.
- Finally, select your Call To number by clicking on the number you wish to choose.
- When complete, click Save.
back to top button


