[#article-topic-1]Overview[#article-topic-1]
The odin platform supports integration with Cisco’s Webex for BroadWorks using a standard OAuth2 Authorization Grant Flow. The integration between Webex and odin happens in two stages. The first stage of the integration configures the two platforms to communicate using a BroadWorks account and a Cisco Webex for BroadWorks Control Hub account. The second stage is to utilize Webex Control Hub features within the odin platform. Most Control Hub users are familiar with the latter. This guide covers how to set up the integration between odin and Webex.
odin Architecture
A general understanding of the odin architecture will help in configuring this integration. The platform consists of two technologies:
- A Single Page Application (SPA)
- An Application Programming Interface (API).
These two technologies are often used in modern web development and modern websites. Two reasons for using these technologies are:
- A better user experience
- Technological flexibility.
These two reasons specifically make integrating the odin platform using the OAuth2 authorization scheme into Cisco Webex for BroadWorks a natural fit.
odin, Cisco Webex for BroadWorks and OAuth2 Concepts
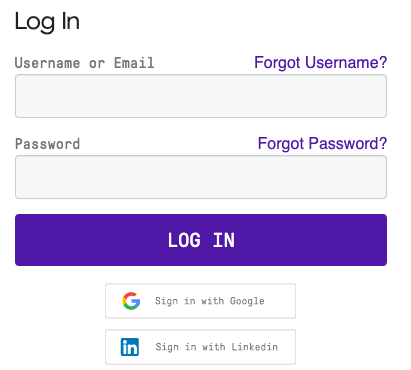
The integration between odin and Cisco Webex for BroadWorks hinges upon the OAuh2 authorization technology. This technology uses an identity from one provider to gain access to resources that exist on another provider. For example, using a Google or LinkedIn account to login into news, professional, or blogger sites.
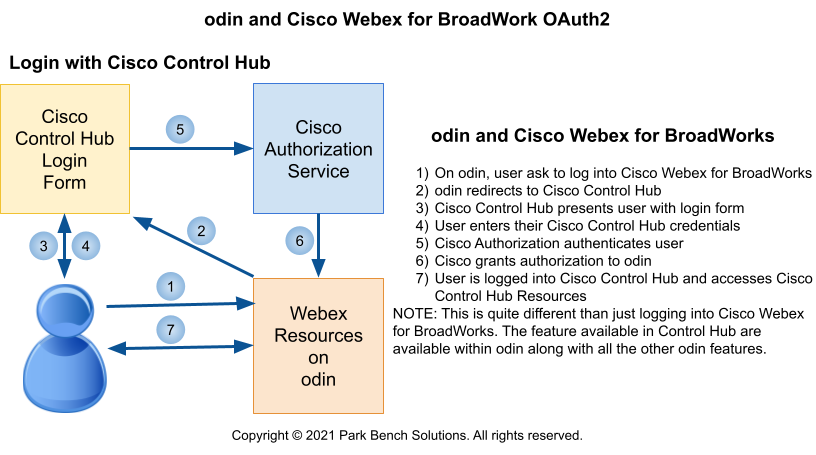
Below is an OAuth2 Authorization grant flow; it gives the user access to specific resources on one site by leveraging the authority of another entity. The grant flow follows the steps outlined.

The user utilizes their Google credentials to access resources on a specific website. This is the same OAuth2 grant flow that odin, Cisco, and Cisco for BroadWorks utilize. So, in this case, the grant flow appears as shown.
odin Webex Integration Benefits
Unlike the Google example, odin and Webex platforms each have their authentication mechanisms, e.g., usernames and passwords. The authentication mechanisms add additional functionality above the standard OAuth2 Authorization Grant Flow. Specifically, when an odin user logs into Cisco Control Hub through the odin platform, features available in Cisco Control Hub are not available within the odin platform without going to Cisco Control Hub.
For details about OAuth2, see The OAuth 2.0 Authorization Framework.
[#article-topic-2]Webex with odin Integration[#article-topic-2]
To integrate Webex with odin, you need a BroadWorks System or Provisioning Account and a valid Webex developer account attached to Control Hub.
- Go to https://developer.webex.com/ and click Log in.
- Enter the Control Hub Webex email address.
- Enter the Control Hub Webex password and click Sign in.
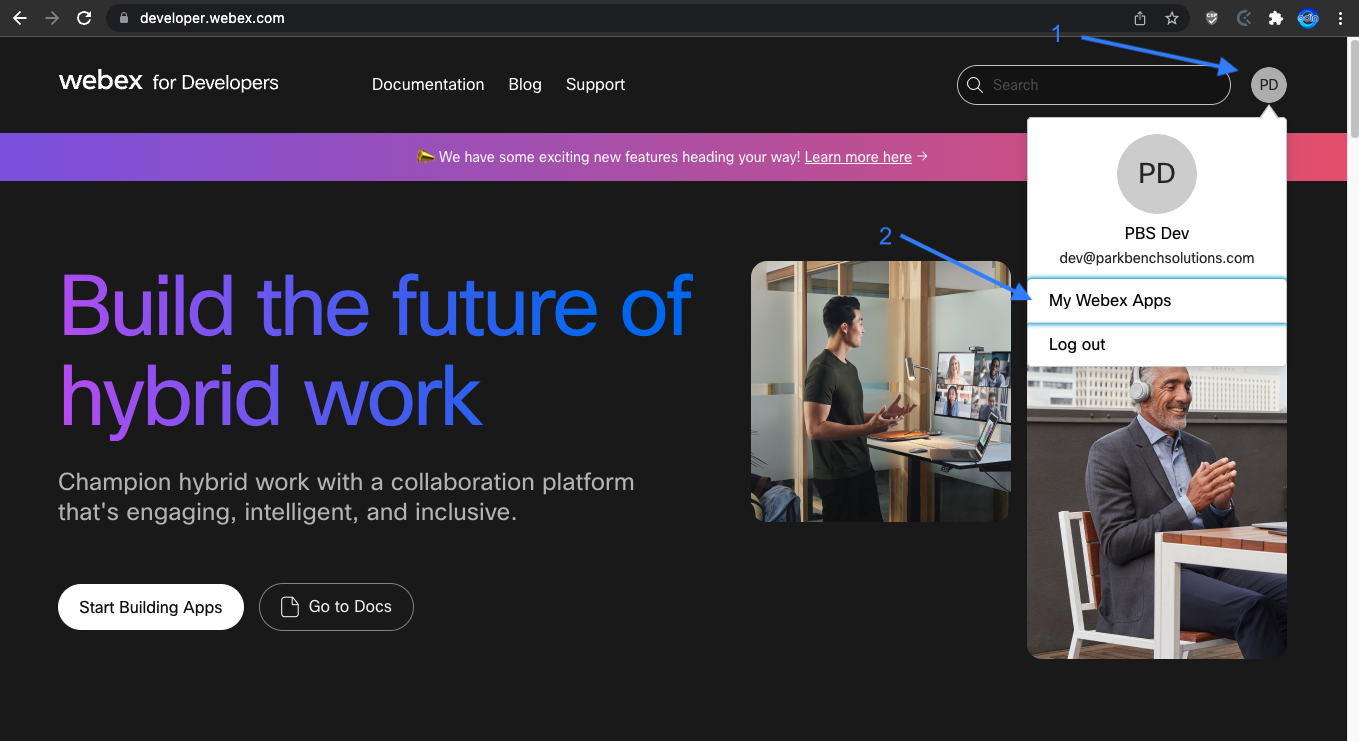
- Upon being returned to the Webex Developer Home page, the Webex Developer is logged in.
To integrate Webex:
- Click the avatar or profile initials in the upper right corner and select My Webex App.
- Webex has no restriction on the number of Webex Apps. To create one, click Create a New App.
- Click Create an Integration.
- Complete the fields for Part 1 of New Integration.
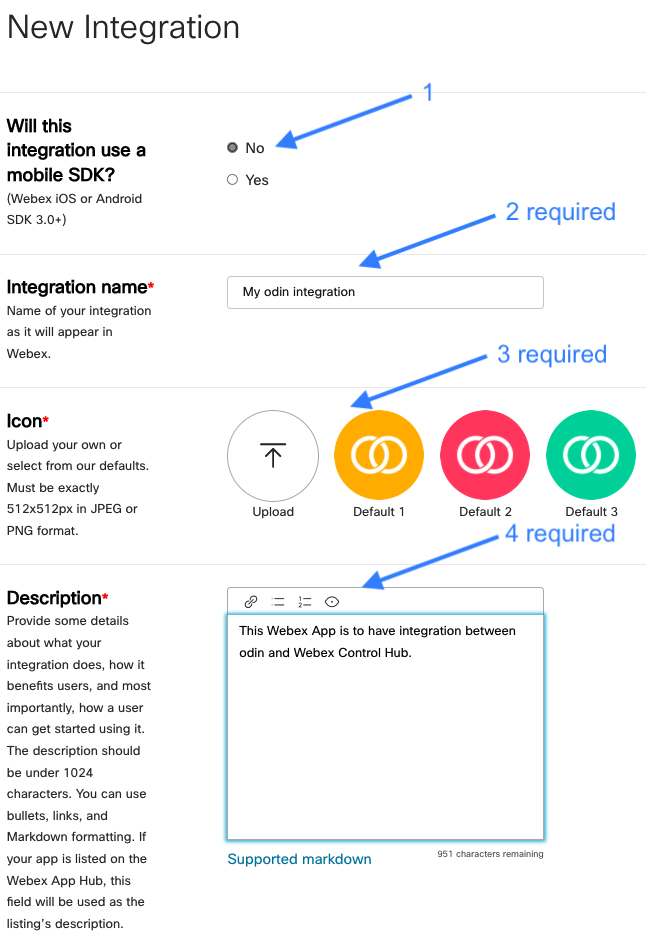
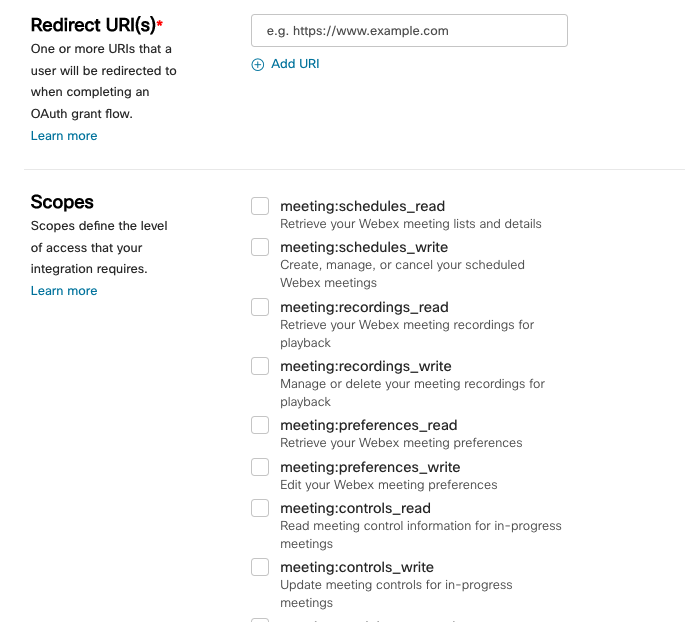
- Fill out the New Integration, Part 2. The Redirect URI(s) come from the odin platform in a later step. Since this is a required field, use something like https://www.example.com.
As for the scopes, there are no limitations on the number selected.
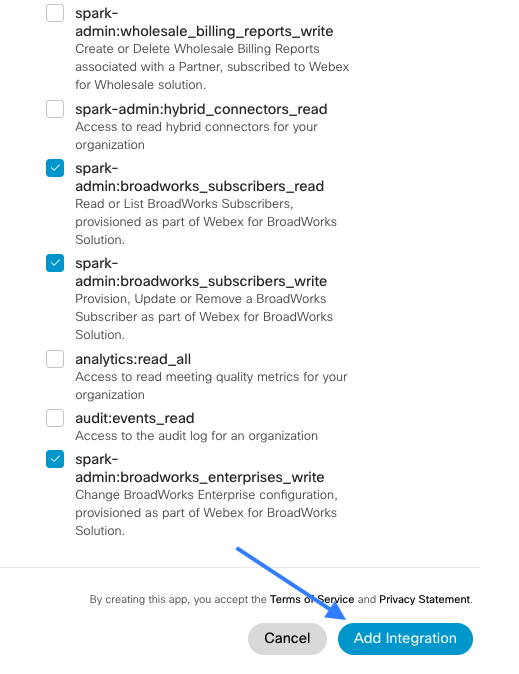
- For the integration to work with odin, the following are the minimum requirements:
- spark-admin:broadworks_subscribers_write
- spark-admin:broadworks_subscribers_read
- spark-admin:broadworks_enterprises_write
- spark-admin:broadworks_enterprises_read
- spark-admin:people_write
- spark-admin:people_read
- spark:organizations_read
- spark:people_write
- spark:people_read
- Click Add Integration.
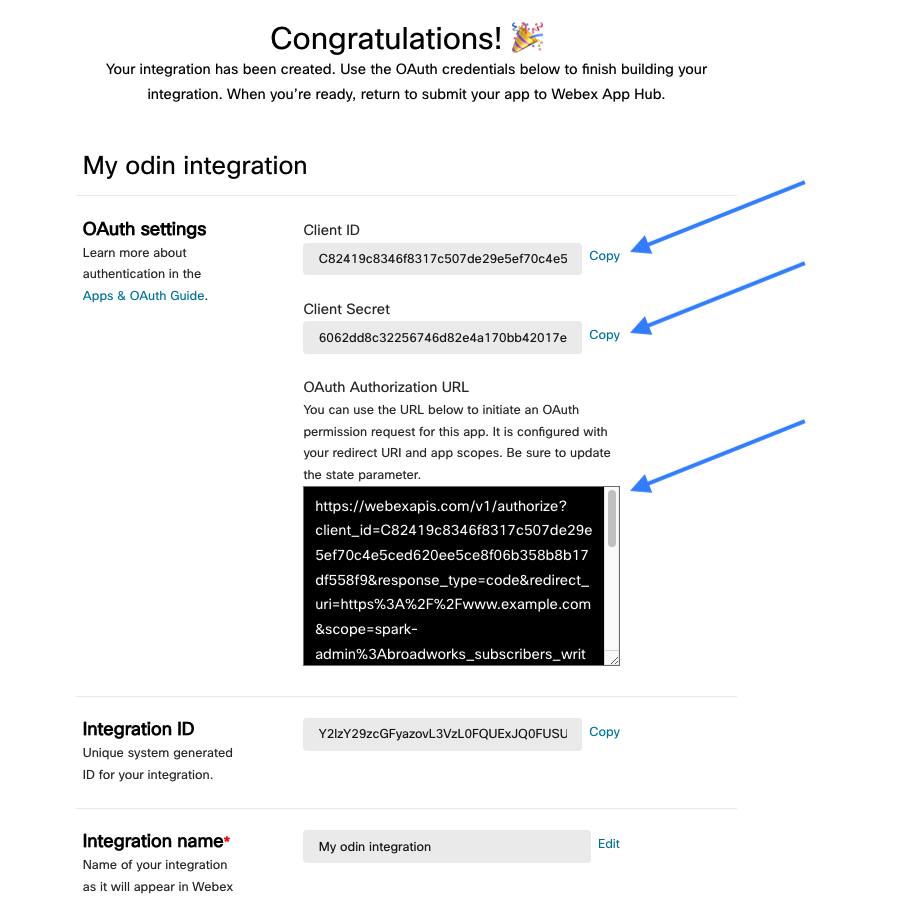
- A confirmation message appears that the integration is successful; however, don’t leave this page yet. You must add three pieces of information to odin.
Please Note: The Client Secret is only shown at this time. Leave this page open, and open another browser window or tab. Go to the odin portal and log in with a BroadWorks System or Provisioning level account.
- In the odin portal on the System Dashboard under Utilities, go to Settings and then Webex. Click the Plus icon to add the Webex Integration.
Please Note: odin supports unlimited Webex Apps for an unlimited amount of Branded URLs.

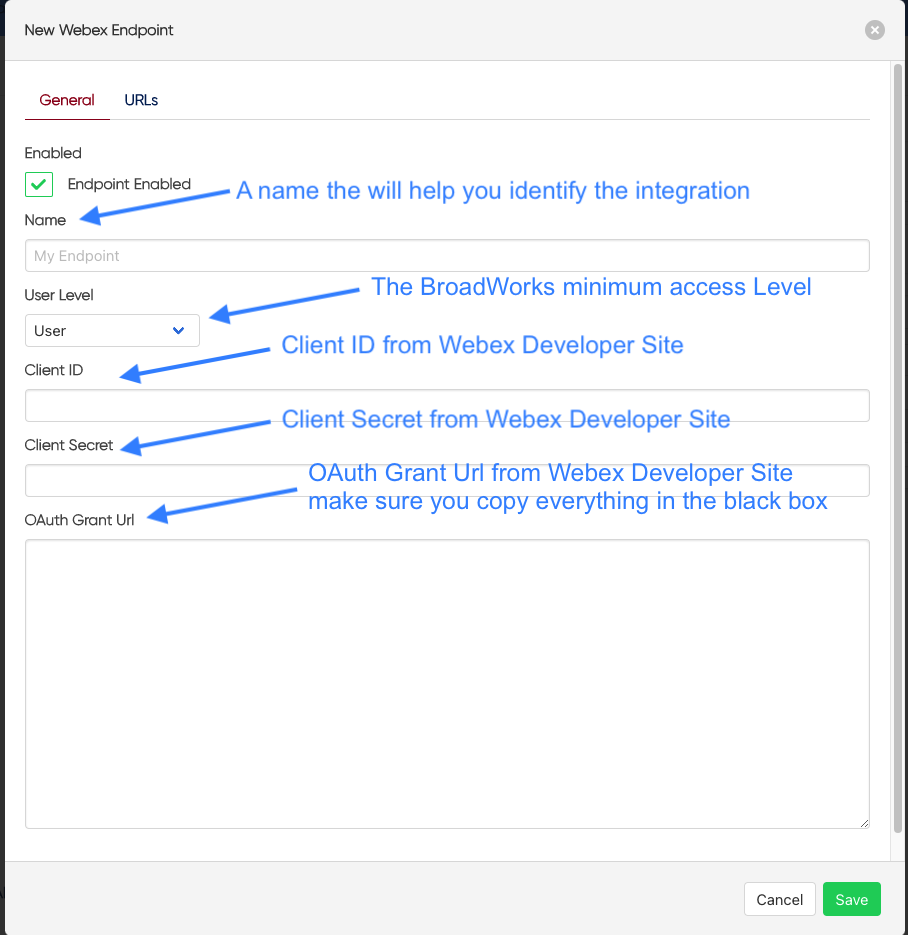
- Enter information under the General Tab. The last three items are from the Webex Developer site.
Please Note: Do not close that browser window or tab once this information is copied and pasted; more information will need to be added to this page later in the integration process.
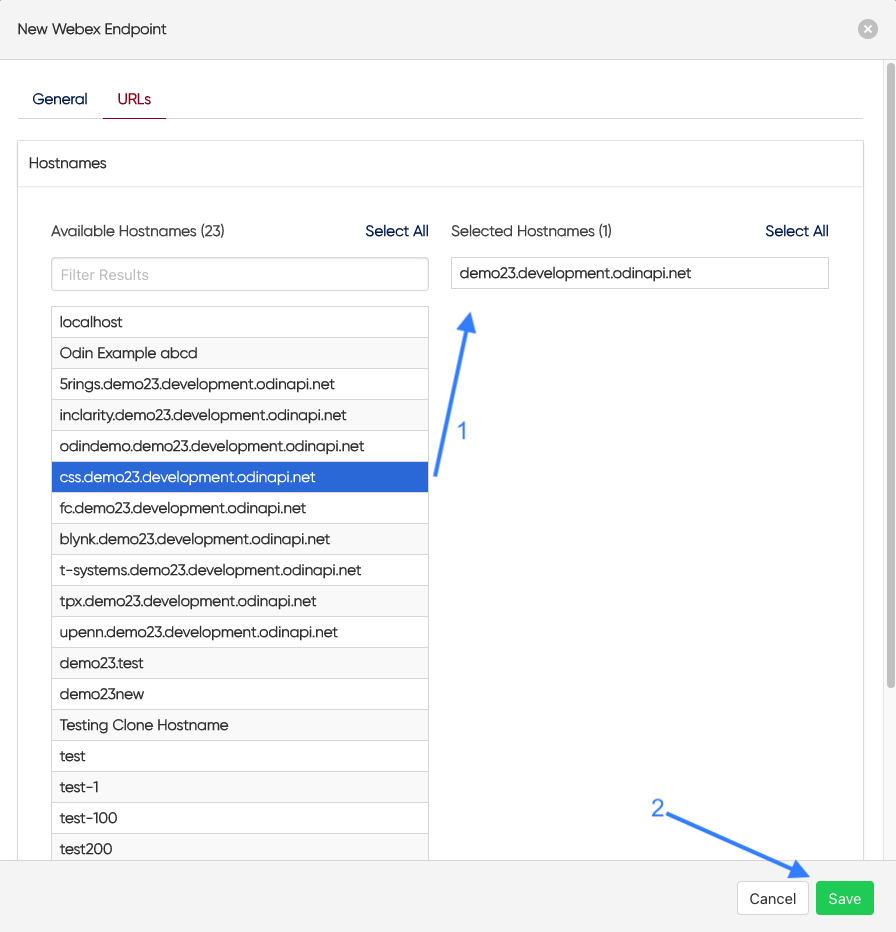
- Once finished with the Webex General page, Click URLs.
- Add the URLs desired to utilize the odin Webex integration by clicking the available hostnames. These are the URLs from the Branding section. Once all the URLs are selected, click Save.
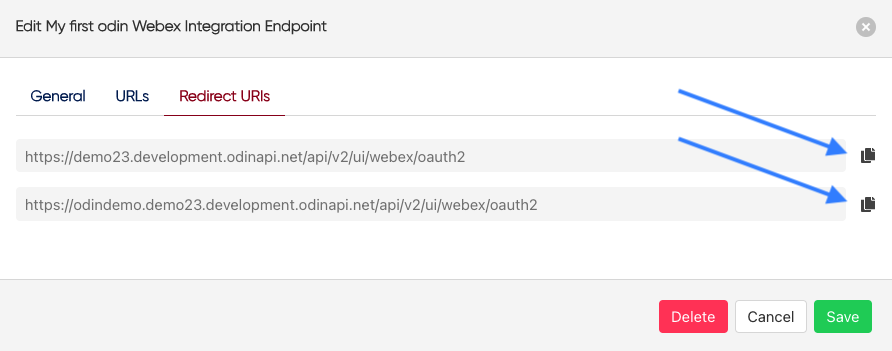
- Once Saved, it will appear in the list of odin Webex integration. Select the integration that was added.
- The integration has a new tab. Click Redirect URIs. Add the URIs to the Webex App on the Webex Developer page. There is a copy button to help with this process.
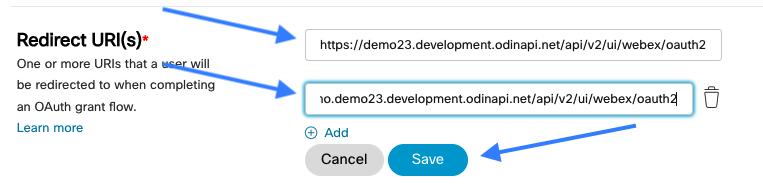
- Go back to the Webex Developer Page and click Edit.

- Add the Redirect URIs from odin to the Redirect URI(s) in the Webex App. Click Save.
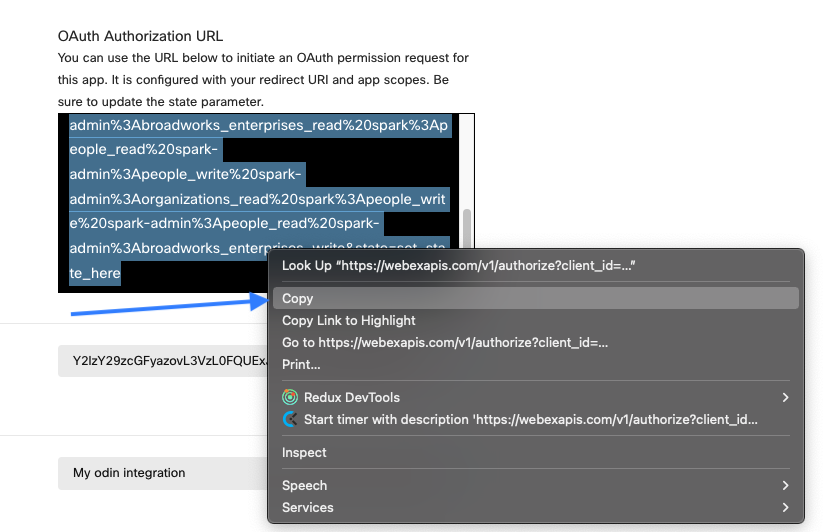
- On the Webex Developer page, the OAuth Authorization URL changes when URIs are updated. Copy the block of text to update the odin portal.
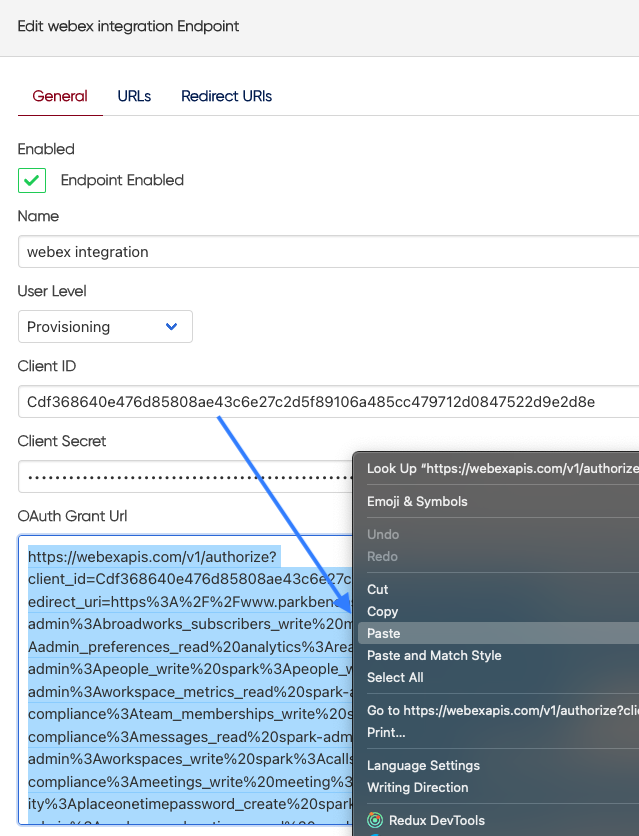
- Paste the updated OAuth Authorization URL into odin.
[#article-topic-3]Access Webex through odin[#article-topic-3]
Once the Webex App is created and integrated with odin, users with the proper permissions can access Webex features within odin.
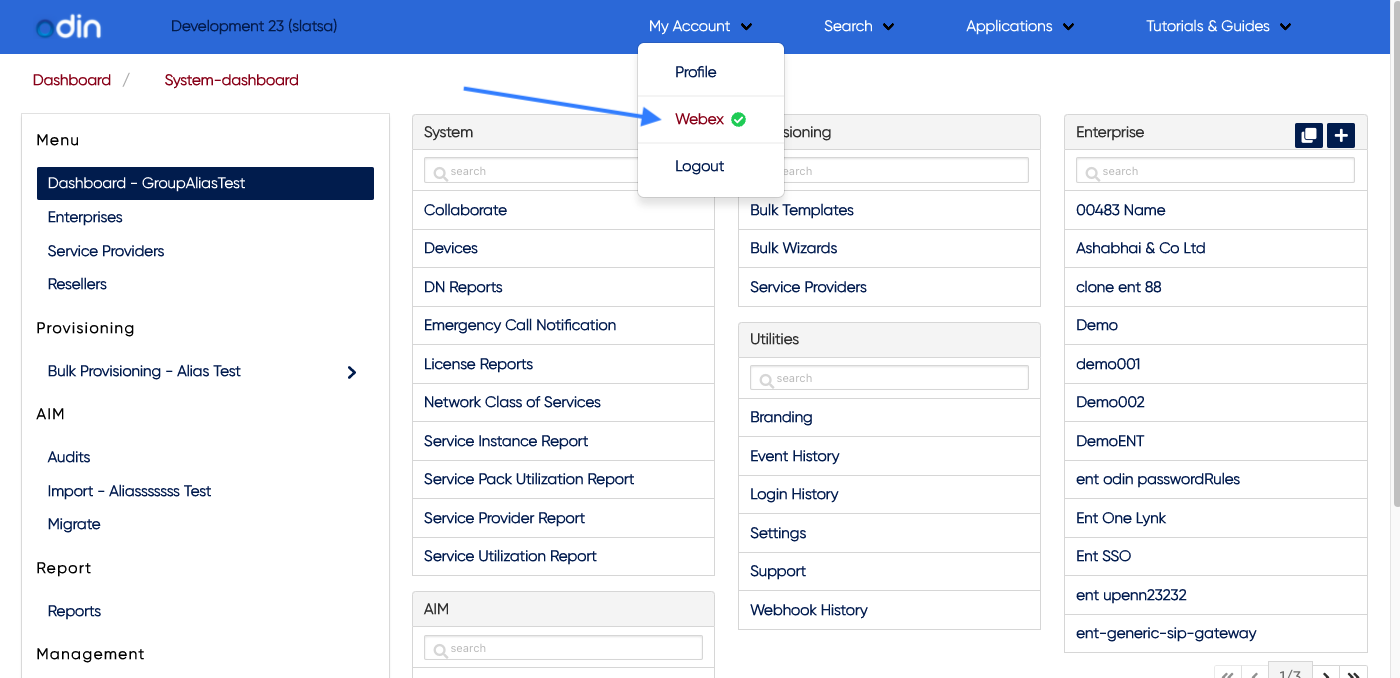
- Once logged into odin, a red exclamation point is displayed next to My Account. Hover over it to reveal the new Webex menu item with a red exclamation mark. Click Webex.

2. The Cisco Webex login page is displayed. Enter the Webex email address.
3. Enter the Webex password and click Sign in.
4. Once logged in, a grant dialog box appears. Click Accept to integrate Webex with odin.
5. The user is redirected to the odin platform, and the Webex menu item has a green checkmark, allowing the user to leverage the integrated Webex functionality with odin.
This completes the odin with Webex integration process.