


This article will take 4 minute(s) to read.
[#article-topic-1]Introduction[#article-topic-1]
You can create User Schedules for various service features that may require them. You have the ability to create regular Time schedules or Holiday schedules.
[#article-topic-2]User Schedules[#article-topic-2]
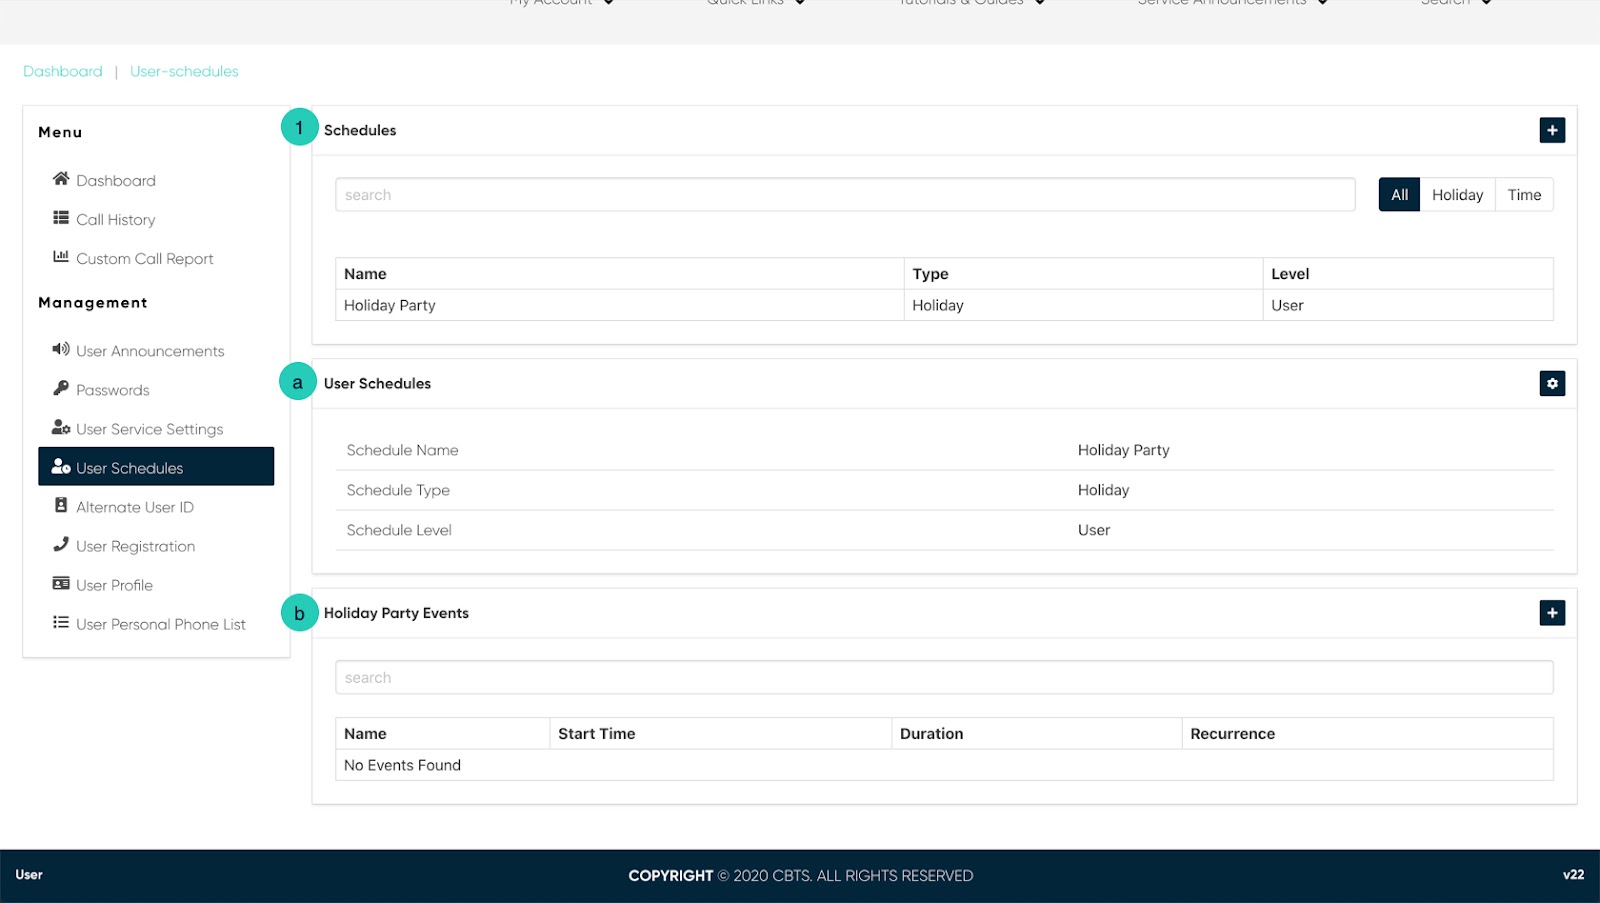
- From the user dashboard, locate and click the User Schedules tab in the left-hand navigation bar. The Schedules page will appear.

- You can access all of your created User Schedules here in the Schedules table. To search for a specific schedule, enter the name in the search field and any schedule that resembles that name will automatically start appearing in the table below.
- You can also filter your results using the items to the right of the search bar. You can filter by clicking on All, Holiday, or Time.

[#article-topic-3]Adding Schedule[#article-topic-3]
- To add a Schedule, click on the Plus icon. The Edit Settings window will appear.
- Proceed to enter the name of the Schedule.
- Then, select whether it is a Time Schedule or Holiday Schedule from the drop-down menu.

- Click Save. Your newly named schedule will now appear below in a table.
[#article-topic-4]Adding Office Events[#article-topic-4]
- To add an office event, click on the schedule you would like to use. This will generate two additional tables (a and b) below the main schedule table.
- Click on the Plus icon in the Office Events table. The Edit Event window will appear.
- Proceed to enter the Event name.
- Select whether it is an All Day Event or not. If it is, check the box to enable it.
- If it is not an All Day Event, add the “Start At” and “End At” time in the corresponding fields.
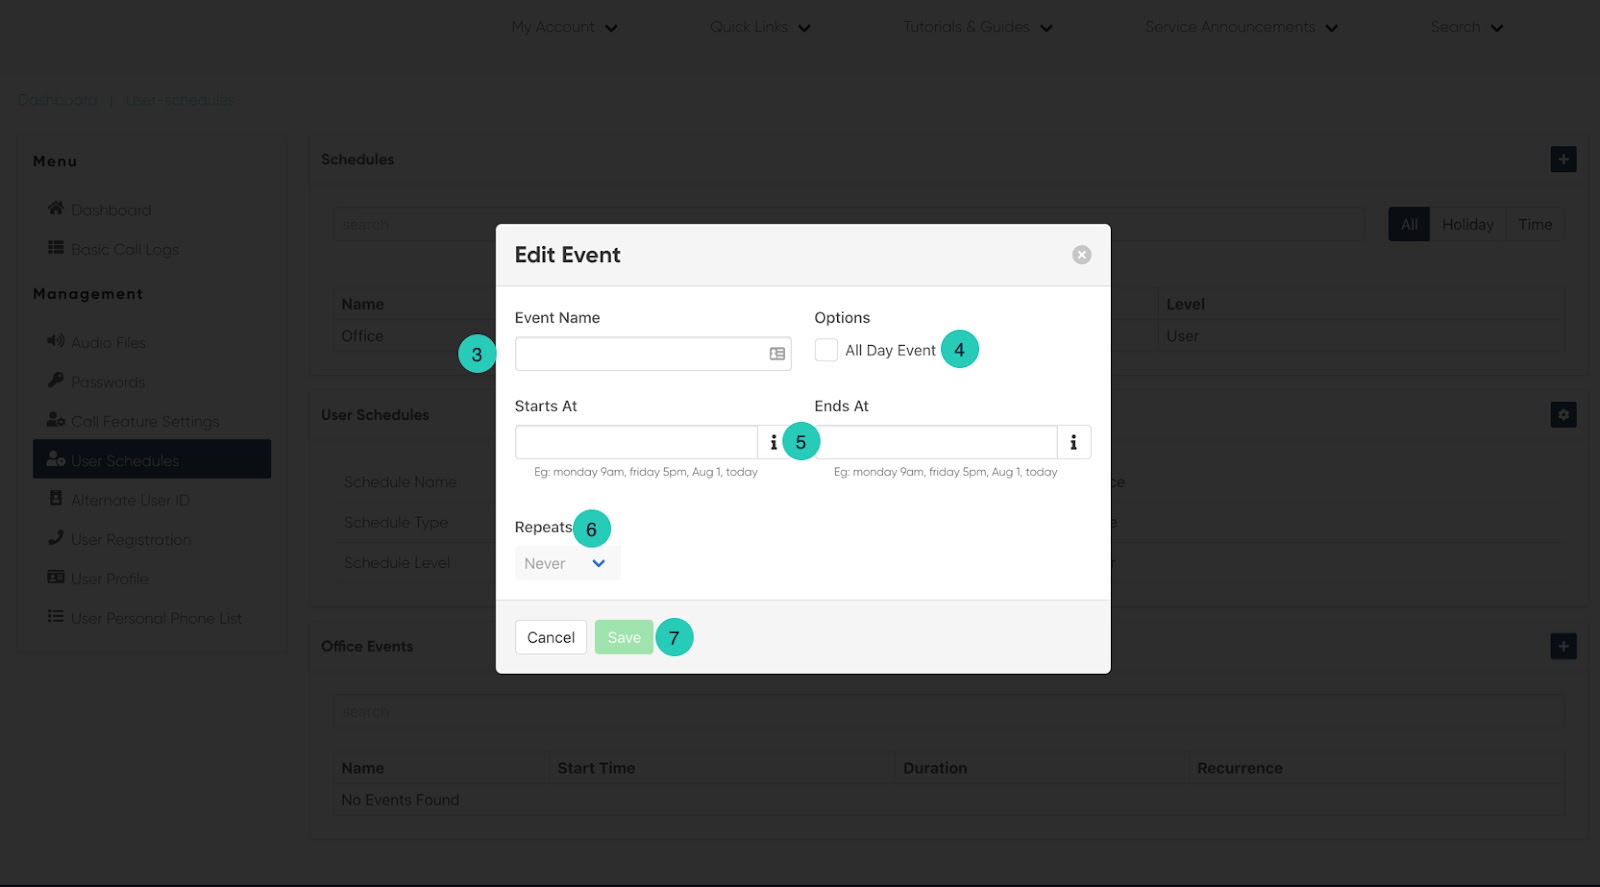
Note: Enter the date and time in the following way: month day year time AM/PM. Use only spaces to separate each time item.
- Next, from the drop-down menu, select whether or not this office event will repeat or be a single event.
- When complete, click Save.
- Your Office Event will now be listed in the appropriate table.
back to top button
