This article will take 4 minute(s) to read.
[#article-topic-1]Departments[#article-topic-1]
The Departments section of the admin portal lists all the departments in your group. A department is a subset of users within a group, and users are individuals within a group or department. Creating departments allows you to create a department administrator, who can then control a small subset of users.
As a group admin, you can add, modify or remove departments, as needed. This guide reviews those steps.
[#article-topic-2]Add a Department[#article-topic-2]
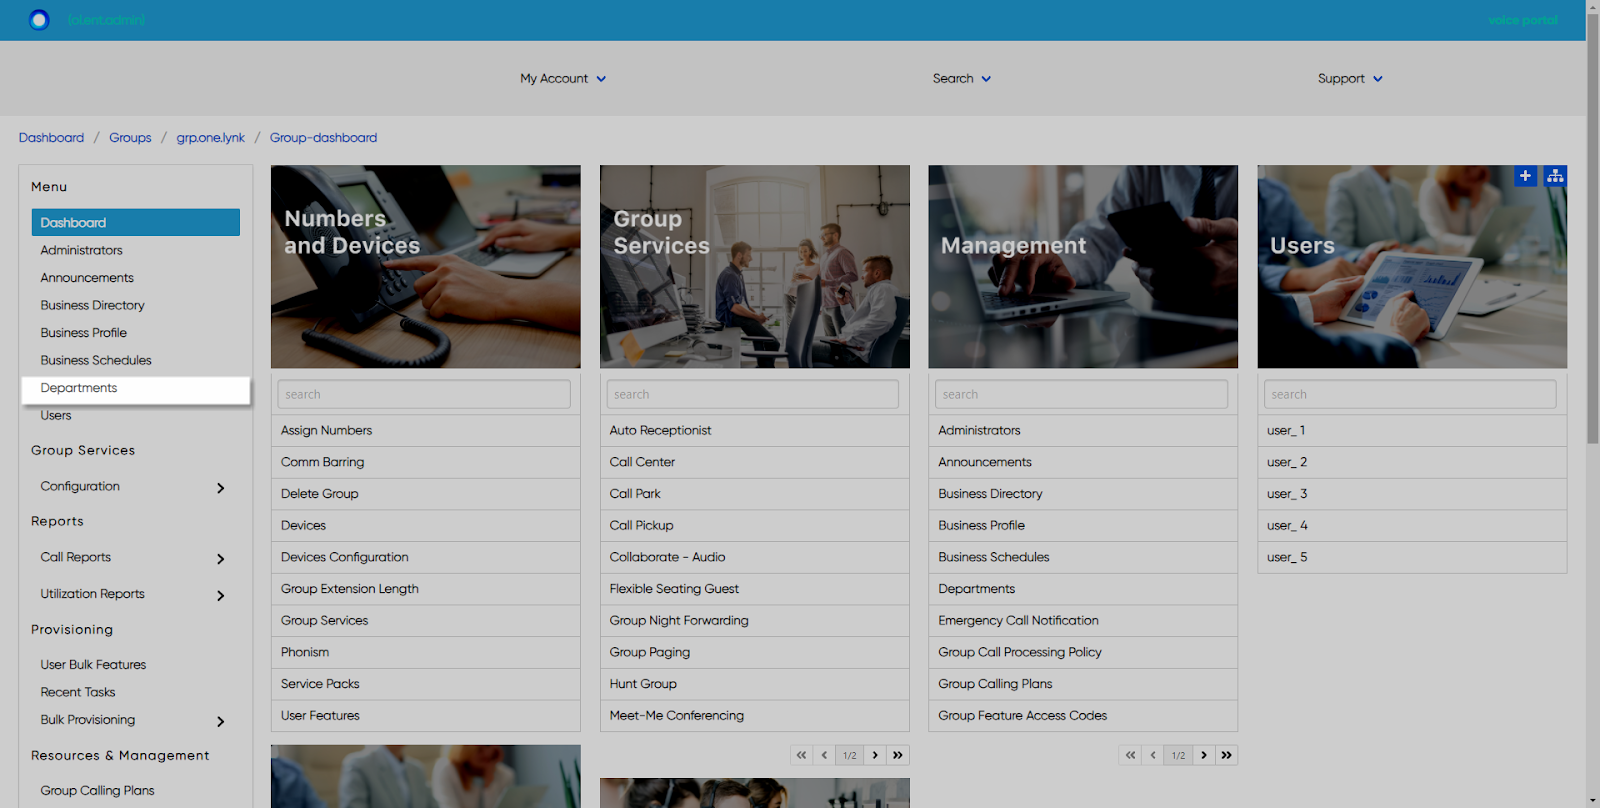
- From the group dashboard, select Departments from the left-hand menu.

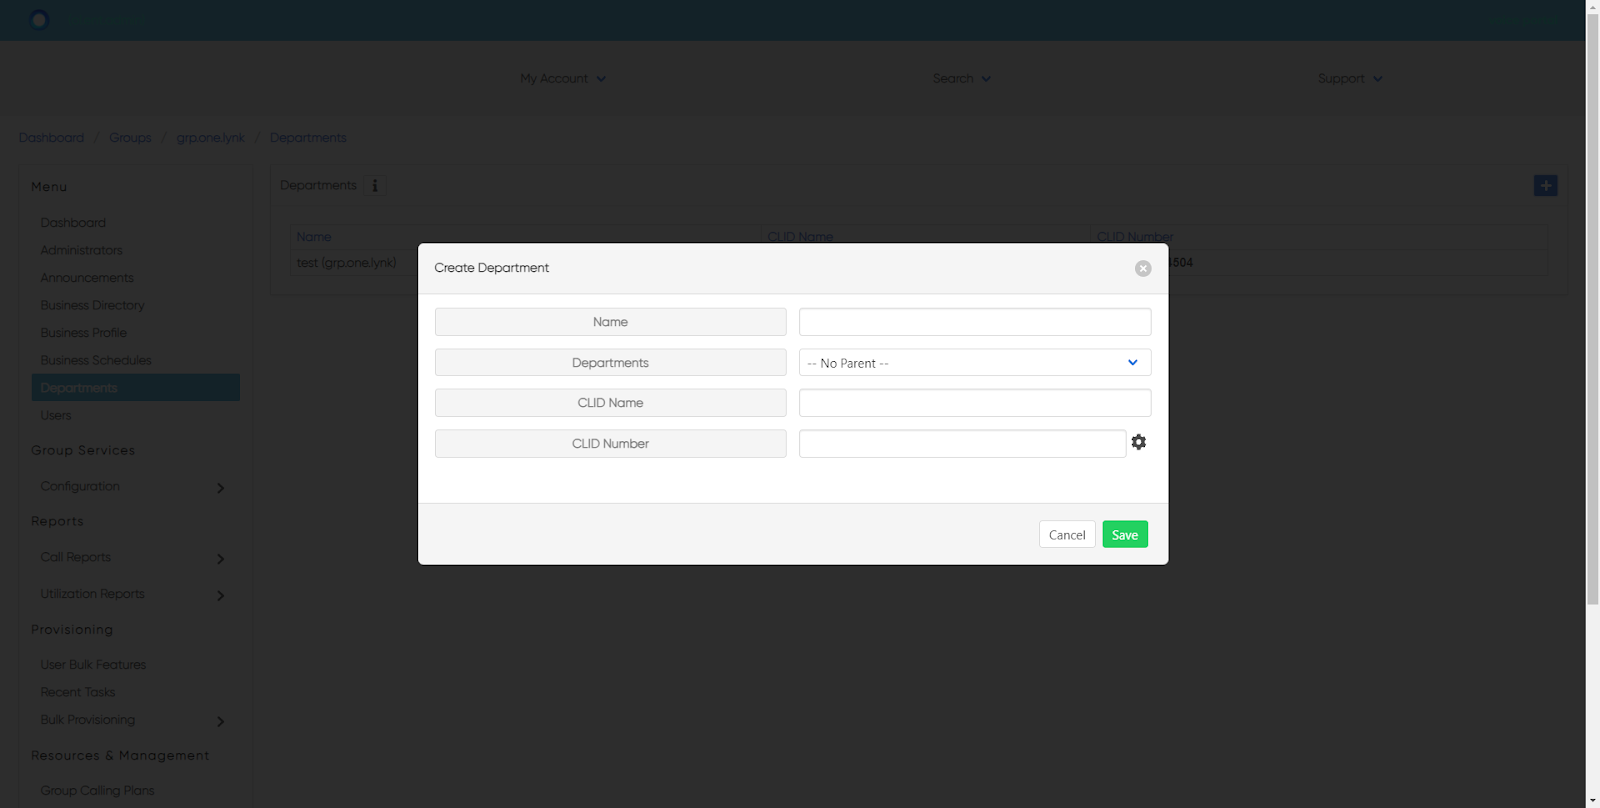
- Here you will see a list of departments assigned to this group/location. To add a department, select the Plus icon.
- Enter the Name of the department.
- If applicable, enter the Parent of the department.
- Enter the Calling Line ID Name (CLID).
- If applicable, assign the department a phone number in the CLID Number field.
- Select Save to save your changes and add the department.

[#article-topic-3]Modify a Department[#article-topic-3]
Once the department is created, you can modify the settings or add an administrator at any time.
- From the departments page, select the department to modify.
- Select the Settings icon in the upper, right-hand corner.
- The Edit Department pop-up will appear. Modify the areas needed and select Save to save your changes.

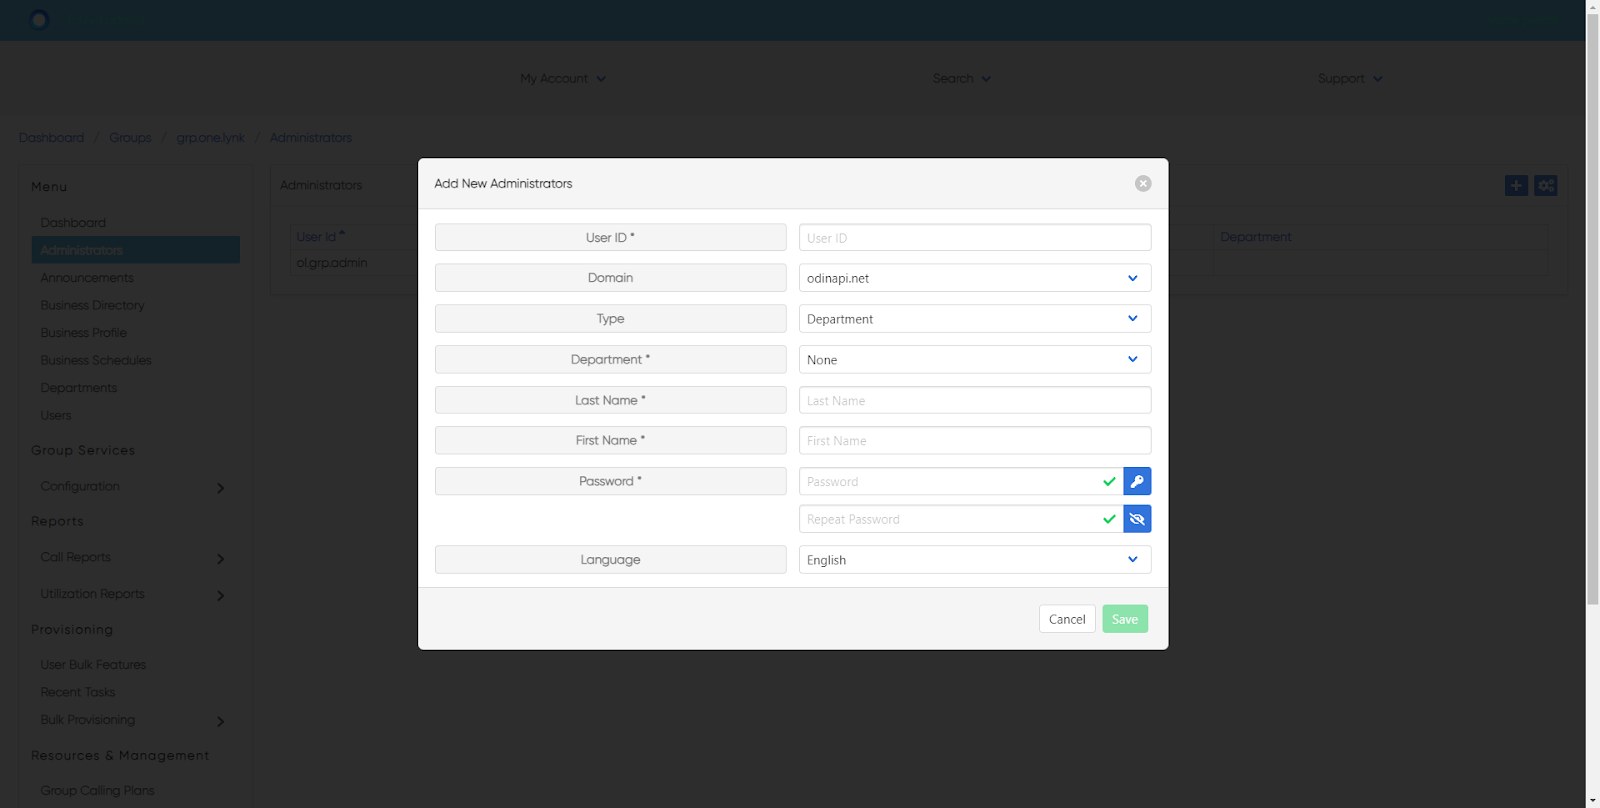
- To add an administrator to a department, select the Administrator tab.
- Select the Plus icon.
- Enter the User ID and Domain for the administrator.
- Select Department next to Type.
- Enter the Last Name, First Name, Password and Language.
- Select Save to save your changes and add the department admin.

[#article-topic-4]Delete a Department[#article-topic-4]
- From the departments page, select the department you would like to remove.
- Select the Settings icon in the upper, right-hand corner.
- The Edit Department pop-up will appear. Select Delete to remove the department. You will be prompted to confirm.
back to top button


