


[#article-topic-1]Hunt Groups[#article-topic-1]
A Hunt Group is used to ring a specific group of users in a predetermined pattern within or across locations. As business needs change, the admin can adjust the Hunt Group settings.
[#article-topic-2]Modifying a Hunt Group[#article-topic-2]
Administrators can set up and modify Hunt Groups within the admin portal. To view and modify a Hunt Group, follow these steps:
- From the group dashboard, select Hunt Group under Group Services.
- A list of the Hunt Groups assigned to this group/location are displayed.
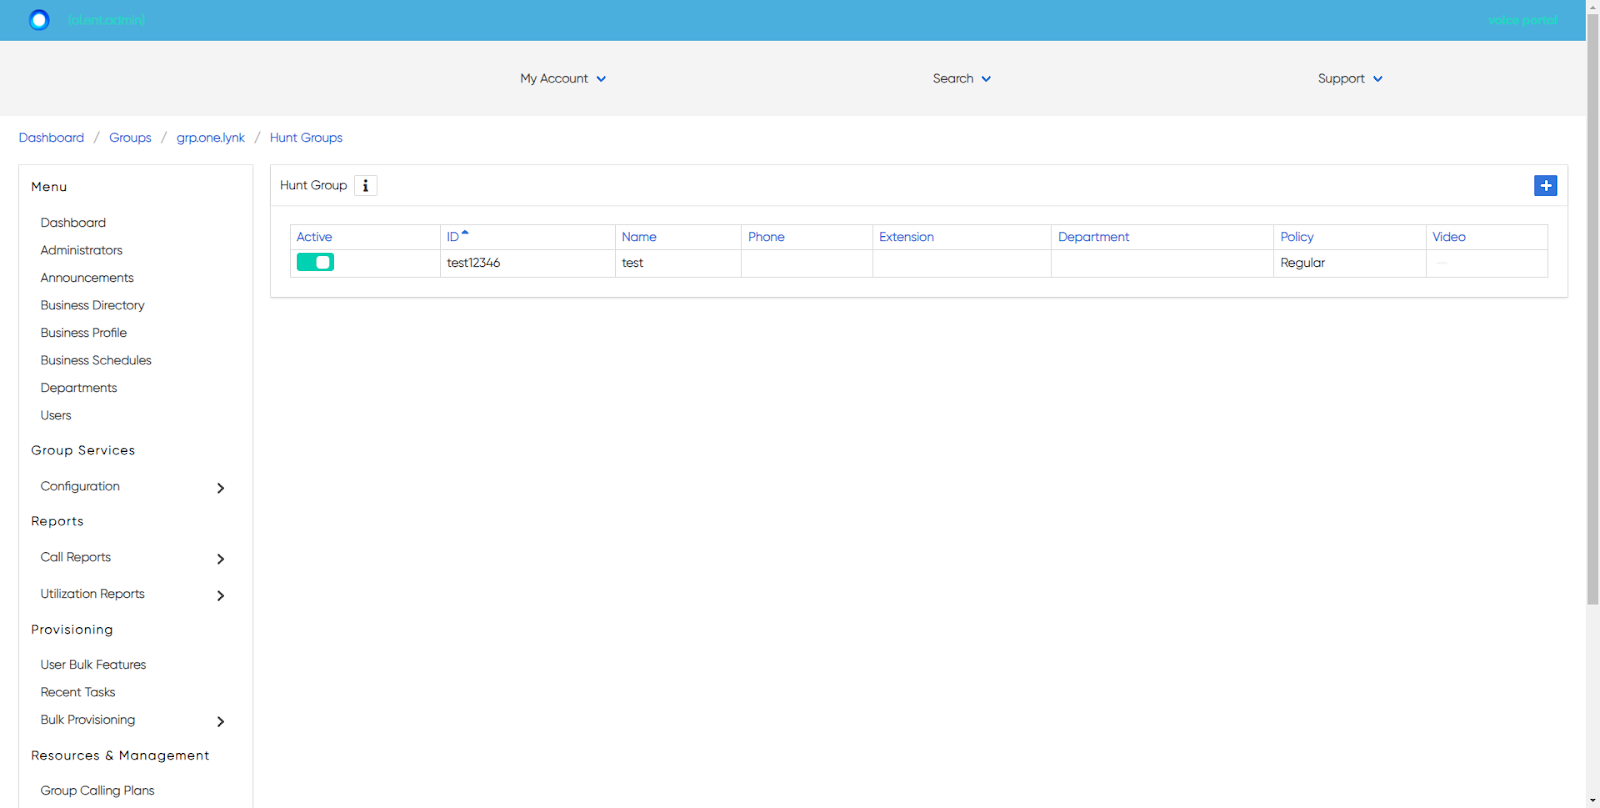
- Select the Hunt Group you would like to modify. The left-hand navigation refers to the settings available to modify.
- Agents
- Profile
- Settings
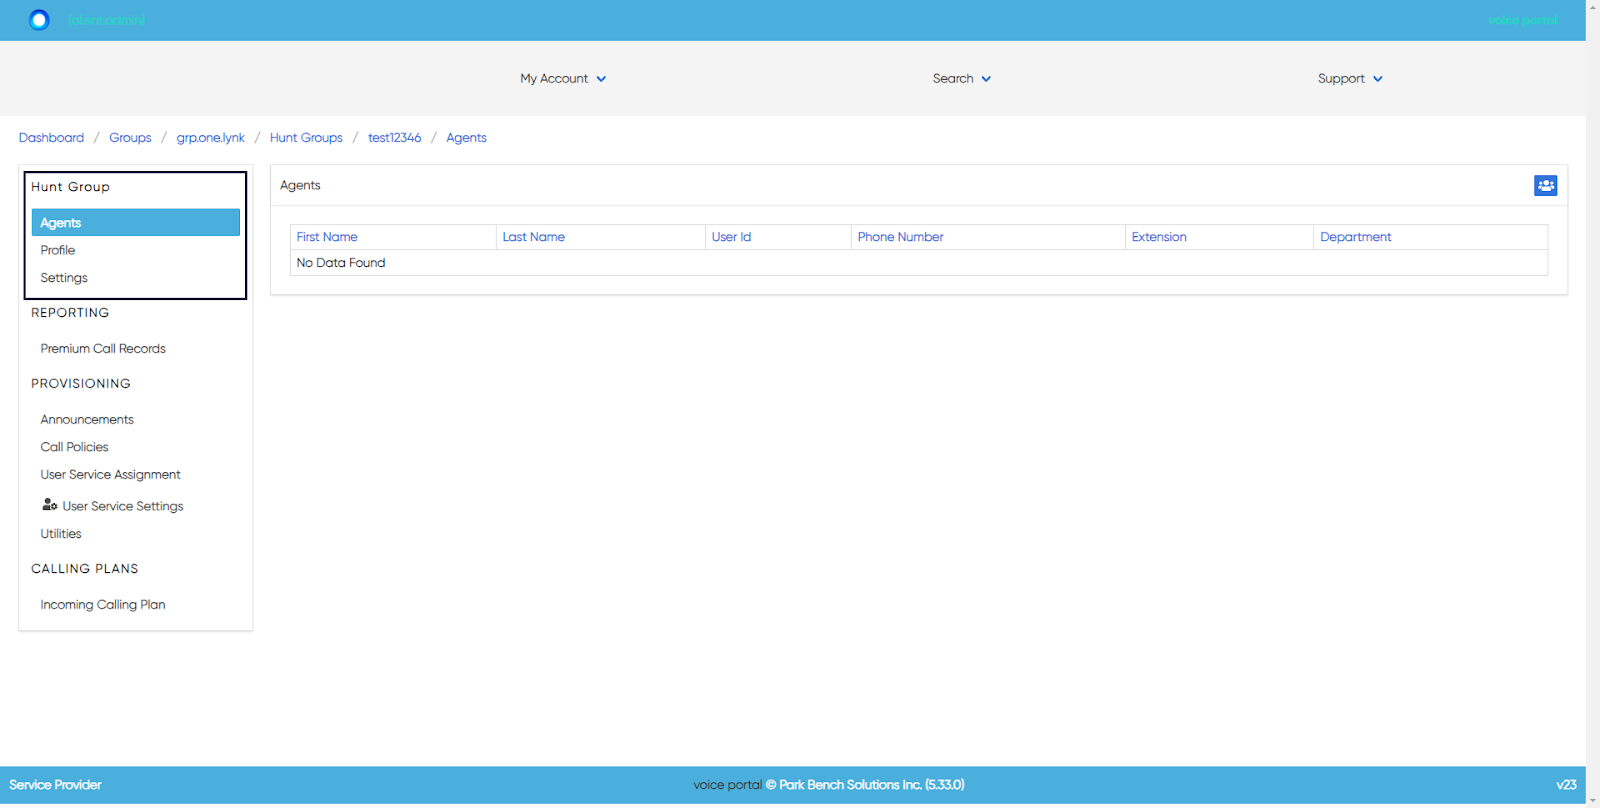
Agents
The Agents tab displays the agents assigned to this Hunt Group. To edit the assigned agents, select the Settings icon in the upper, right-hand corner.
- Here you can see the Available and Selected agents. To assign/unassign an agent, simply click the agent’s name/contact information and the agent will move to the other list.
- Use the arrows next to each agent in the Selected column to adjust the order in which the agents will ring, depending on the routing assigned.
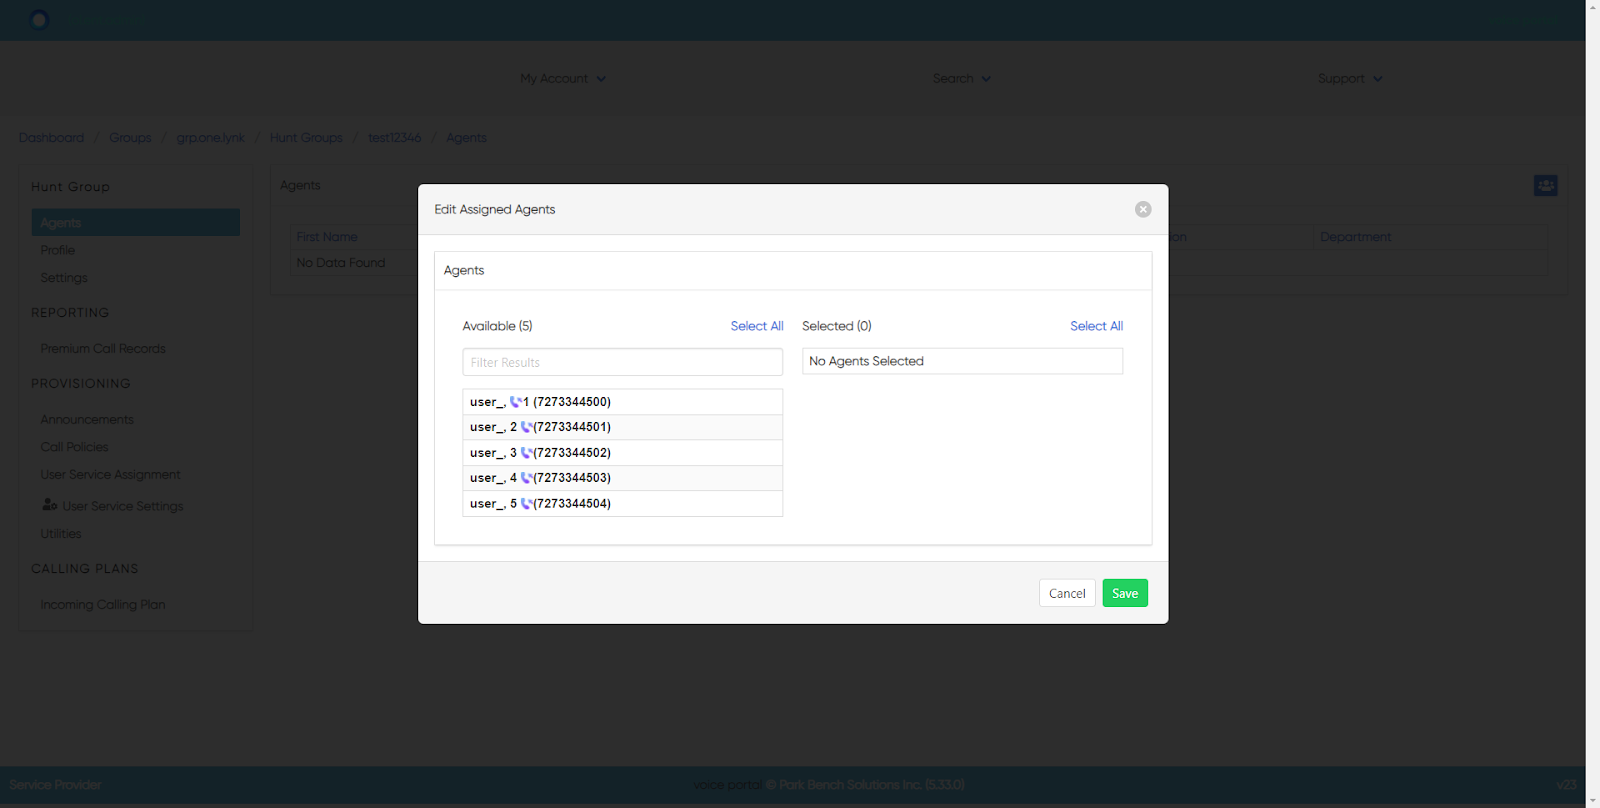
- Select Save to save your changes.
Profile
The Profile in the left-hand menu is where you can view the Hunt Group profile details. Select the Settings icon to modify.
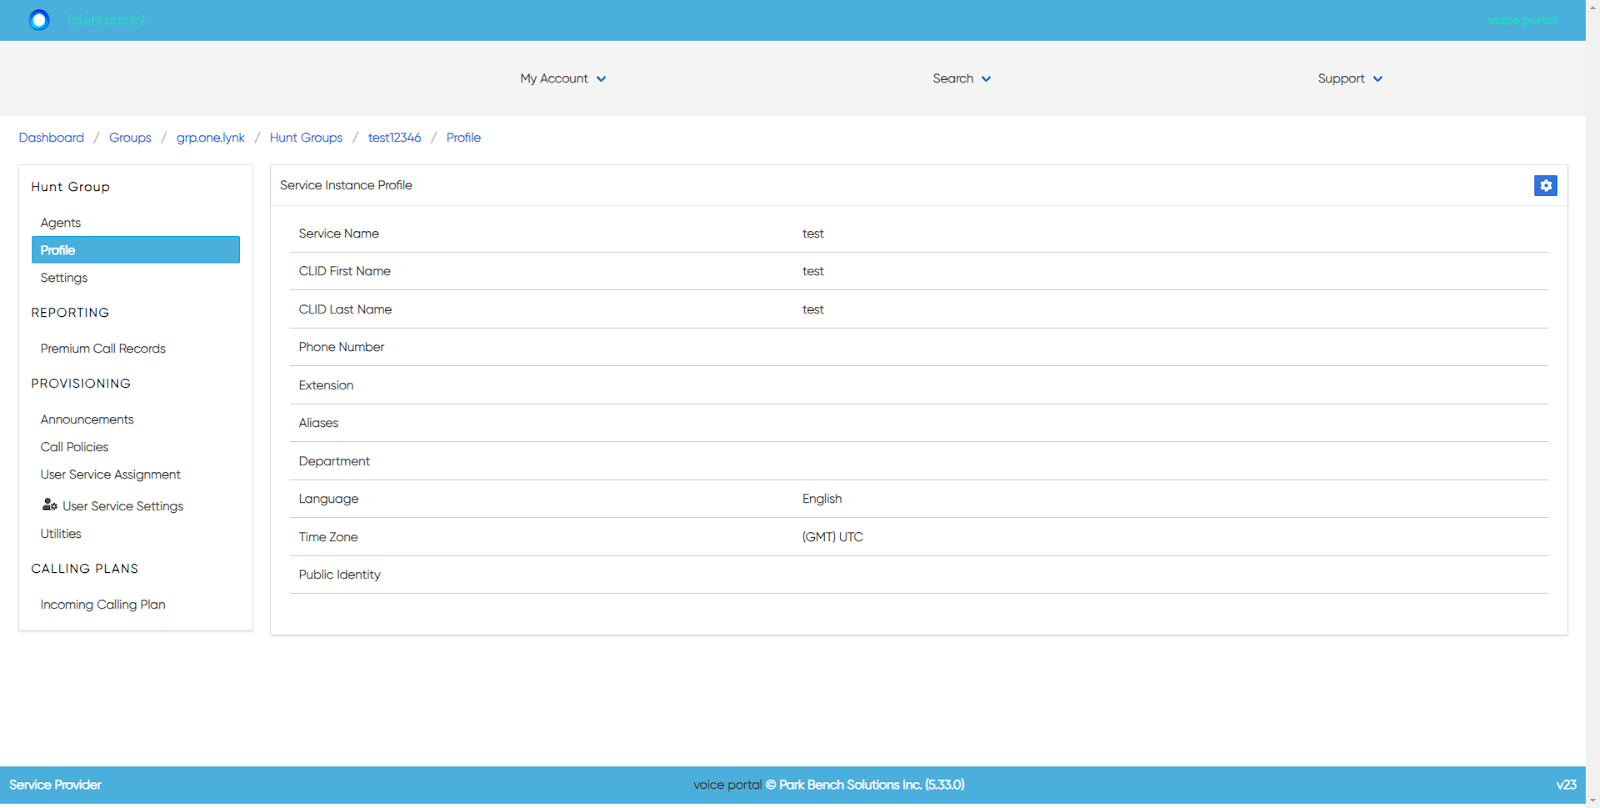
Here you can modify the following settings:
- Service Name
- Calling Line ID (CLID) Last Name
- Calling Line ID (CLID) First Name
- Phone Number
- Extension
- Password
- Public Identity
- Department
- Language (for the audio announcements)
- Time Zone
- Alias
Settings
The Settings tab in the left-hand menu is where you can view the Hunt Group setting details, including the schedule assignments. Select the Settings icon to modify.
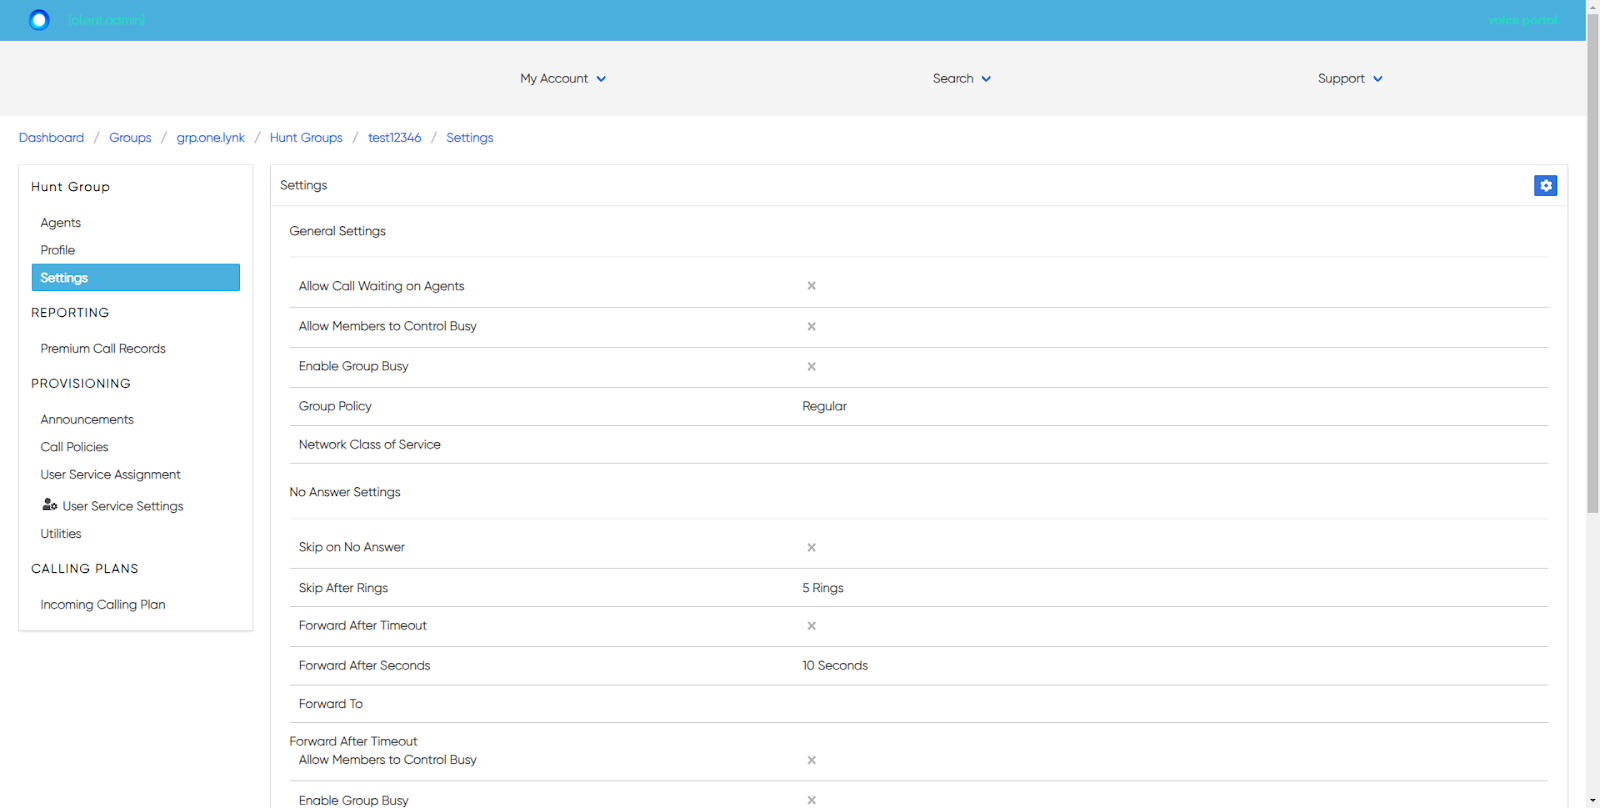
Here you can modify the following:
- General Settings
- No Answer Settings
- Not Reachable Settings
- Calling Line ID Settings
Settings - General
- Under the General Settings, you can enable/disable the following:
○ Allow Call Waiting on Agents
○ Allow Members to Control Busy
○ Enable Group Busy
- Next, choose the Group Policy. This determines how calls will ring into the assigned agents. Options include:
○ Circular - Choose this option to ring phones one-at-a-time, always ringing the agents in the same order.
○ Regular - Select this option to ring phones one-at-a-time always starting with the agent configured at the top of the Selected list of assigned agents, followed by the agents listed beneath, in sequential order.
○ Simultaneous - Rings all assigned agents at once.
○ Uniform - Ring the agent in the group who has been idle the longest.
○ Weighted - Select this option to direct a certain percentage of calls to individual Hunt Group agents. Note: Agents assigned a 0% weight will only receive calls if all other agents are busy.
Settings - No Answer
- Check the box next to Skip To No Answer to enable this setting. Then select the number of rings.
- Check the box next to Forward After Timeout to forward calls after a set number of them. Then enter the number of seconds and the Forward To number.
Settings - Not Reachable
Check Enable Call Forwarding Not Reachable to forward calls to a specific number when no agents in the Hunt Group are able to answer. Then enter the forwarding number in the Forward To field.
Settings - Calling Line ID
Modify the Calling Line ID settings here. Options include using the default CLID configuration or customizing.
